Buying a Vintage Sewing Machine – What You Need To Know

I’ve done one for TYPEWRITERS. I’m not sure why I haven’t yet done one for sewing machines. Anyway, here goes.

Modern sewing machines have all kinds of advantages and features which make them desirable. But they also have numerous disadvantages which make them undesirable. You can perform a wider variety of stitches and functions, at the expense of poorer quality workmanship, disposable parts, and lack of portability. Unless you can physically carry it ANYWHERE and sew with it, without being tied to a power-outlet, it ain’t truly portable.

People are attracted to antique and vintage sewing machines for a number of reasons. Strength, power, durability, classic designs, and a quality of workmanship and construction which literally cannot be found today in modern machines. So, why might you want to buy a vintage or antique sewing machine?

Reasons for Buying a Vintage or Antique Sewing Machine

It Looks Nice.

First-Impressions are everything. Would you rather use a glossy black and gold, wood-cased classic, or a cheap, flimsy, cloud-white modern machine? Even when your classic Singer, Jones, Wheeler-&-Wilson, Domestic, Butterfly, Stowa, or Frister & Rossman isn’t being used, you can put it on a shelf, or on a side-table, and it can sit there as a beautiful piece of industrial art.

Can your modern sewing machine do that? I don’t think so. The problem with more modern machines is that they’re more about function and feature, rather than style and longevity. They’re meant to do something, and once it’s done, you chuck it away into the cupboard.

Antique sewing machines were designed to appeal to people’s sense of style – Don’t forget that buying a sewing machine was a HUGE investment in the second half of the 1800s – they were so expensive, Singer had to come up with a whole new way of paying for them, just so that folks could own one! Few folks could just PAY for one. So Singer allowed for trade-ins in return for discounts, or organised installment-plans and lay-by for customers.

Considering that the machines cost so much, folks weren’t willing to spend the money on something unless what they received in return was ABSOLUTELY SPECTACULAR. And that is just one reason why vintage and antique machines look so much damn nicer than modern ones.

It Has Better Construction.

In my mind, this is not even debatable. Sorry. No. It isn’t.

Vintage and antique machines have better construction, better quality of parts and materials, full-stop. Everything on them is steel or cast iron. Nothing is going to break, snap, wear out, warp in the heat, crack in the cold, melt under desert sun or split in arctic winter.

Old sewing machines are workhorses which will run forever, provided they are maintained properly. Your latest machine, which you paid hundreds of dollars for, is history the moment the electronics crap-out. Now, you have a white, plastic doorstop.

Vintage and antique machines were designed to last until doomsday. Breaking down was not an option, and throwing the machine away and buying another one was UNTHINKABLE! As a result, they had to be made of the very best materials, and made to work forever!

It’s Fun!

I don’t do that much sewing. I repair clothes, I make bags, pouches, the occasional cover or slip for a pillow or cushion, the odd alteration to a pair of trousers, but I enjoy it because it’s fun.

It is. It’s fun to make stuff. But it’s more fun to use something that’s been around for ages, and which will continue to be around for ages. It’s fun to turn that crank, pump the treadle or force the lever, to get those old machines going. The mechanical beauty, the synchronisation of parts, is what makes it fun.

They Work Better

Vintage and antique sewing machines may only do a single, straight lockstitch. But they do it incredibly well. Everything about these machines was designed to work, and to be as durable as possible. Everything was made of steel or iron. And compromising on quality was never even considered. Unlike today.

Why?

Like I mentioned before, it’s because they were so damn expensive. If the machines even DARED to suggest that they weren’t absolutely the BEST that you could buy, then nobody would buy them, because nobody was prepared to spend their hard-earned dollars and pounds on junk!

On top of that, vintage sewing machines had to do a lot more than just repair a torn sleeve. In an age when most people made their own clothes, even domestic sewing machines had to be incredibly tough and rugged. They had to chew through everything from silk, to denim, to cowhide leather. And they were expected to do it without complaint or fault. And they did!

Most people only owned a few sets of clothes, and keeping them repaired and neat meant that a sewing machine had to be able to cope with absolutely anything that was passed under the presser-foot. As a result, they were made to last! Singer even used to do a gimmick where they would sew together two sheets of aluminium metal together, to prove that their machines were powerful enough to punch through solid metal, too!

How to Buy a Vintage Sewing Machine?

So. After reading that whole marketing spiel, you’ve decided that you might like a nice vintage sewing machine. Perhaps you like making your own patchwork quilts. Perhaps you like making clothes? Or maybe like me, you like making pouches and bags and covers, with the odd bit of repair-work thrown in? What do you need to know about buying a vintage sewing machine?

Makes and Models

You need to know what make or model you want to buy. The most popular brand in the world is Singer, of course. But there are others. Wheeler and Wilson, Jones, New Home, White Rotary, and a whole heap of others were American machines. However, Germany was another sewing-machine mecca – brands like Sidel & Naumann, Pfaff, Frister & Rossman, Stowa, Wertheim, and Vesta (among countless others) dominated the European market.

What type of machine you can get your hands on will depend on where you live in the world. If you live in America, Canada, or a country that was part of the former British Empire, chances are, Singer will be the machine of choice. If you live in Europe, then a German machine will be the most common. If you live in Asia, Butterfly (a Singer knockoff-brand based in Shanghai), or one of the numerous Japanese knockoff-brands, will be most prevalent.

Age Before Beauty

When buying a vintage sewing machine, no matter where it was made, or by what company, keep in mind the old adage of Age before Beauty. By that, I mean, pay more attention, first-off, to how OLD a machine is, before anything else.

Why? A number of reasons.

While older machines are certainly very beautiful, and many will still create an excellent stitch, they come with drawbacks. Chief among these are:

Needles

What I shall term ‘1st Generation’ (transverse-shuttle) sewing machines used Singer 12-type needles. These needles are perfectly cylindrical and are unlike any other needle in the world.

Which makes them extremely rare. They’re not manufactured anywhere, anymore. Not even in a reproduction manner. Transverse-shuttle machines are therefore almost useless for sewing with in the 21st century. Unless you have a huge stockpile of these old-fashioned needles lying around – you simply can’t use these anymore. Some later-model transverse-shuttle machines were modified to take modern needles (back in the 1920s and 30s), and you might get lucky using one of those. For more information, see further down).

A German transverse-shuttle sewing machine. Transverse-shuttle machines are easily distinguished by their cross-shaped needle-and-slide-plates underneath the machine-head

Sticking with needles for the time-being (ouch!), keep in mind the following: Some sewing-machine manufacturers actually produced machines which would ONLY take the needles made BY that company FOR their machines. This was prevalent in the United States. This means that, once the company stopped, so did the needles. And while sewing machines will live forever, needles don’t. And once they break or blunt or bend out of alignment, you’ll have to get another one. And if you can’t get another one, your machine is useless.

Bobbins and Shuttles

Another BIG issue is bobbins and shuttles. Early sewing machines, from the 1850s up until the turn of the 20th century, used what are called ‘long bobbins’, and operated on a flying-shuttle stitch-mechanism. 1st gen. sewing machines used transverse-shuttle (‘T.S.’) mechanisms (see above), where the shuttle (with the bobbin inside) sat in a carriage, and ran back and forth across the machine, catching the top thread on every forward pass, to form one lockstitch with every backwards pass.

Then, came the vibrating-shuttle (‘V.S.’) mechanism. This used a shuttle, mounted in a side-swinging carriage that pivoted back and forth under the machine, to form stitches with every forward swing.

Both these stitch-forming mechanisms are extremely old. REALLY old. They date back to at least a decade before the American Civil War. The result is that transverse and vibrating shuttles (and the bobbins stored within them) are no-longer manufactured. This can make them tricky to use. I’ll talk about this more, soon.

Where To Find Them?

Search online. Ebay or Gumtree, or sewing forums. Or try flea-markets, antiques shops or charity shops. I’ve seen plenty of antique sewing machines work their way through charity thrift-shops. Flea-markets, antiques shops and sewing-forums are also great ways to get your hands on things like original attachments and add-ons, missing parts and other accessories for your vintage machine. Stuff like shears, measuring tapes, extra feet, bobbins, oil-cans, original instruction-manuals and spare parts.

My grandmother’s Singer 99k. Complete with extra bobbins, motor-grease, sewing-oil, accessories box, attachments, original manuals, knee-lever, and bed-extension-table. Not shown are the buttonholer, the zigzagger, all the other bobbins, spare winder-tires, case-lid and key, and extra needles in original packaging.

Finding missing parts for your machine is a real adventure, and a great exercise in patience. In a pinch, you can sometimes find substitutes. The replacement slide-plate for my Singer 128 isn’t for a Singer machine. It actually belongs to a German-made Frister & Rossmann machine, but I found it in a box of old bits and pieces, sans machine.

What Price to Pay?

Sewing machine prices vary WILDLY depending on where you live. But keep in mind that antique machines are extremely tough. They can be over a century old, and still work PERFECTLY. These things were NOT designed to break down, and they were NOT designed to be thrown out. They were designed to last for centuries. And they do!

That being the case, they are not as rare as you might think. And since they’re not that rare, they are also not that valuable, and should not be very expensive. A vintage sewing machine in working, functional condition can be purchased for $100 or less in many, many cases. In some instances, even less than $50, or $25, depending on how lucky you are. You may even get one for free! You might even have inherited one! The key is not to spend more than is necessary.

Sewing machines were VERY common. There was a time when EVERY HOUSEHOLD HAD to have one! I don’t mean because it was some sort of fashion-accessory, I mean that they HAD to have one, or else, the whole family would be ass-naked. There was simply no other way to get clothing! The result is that there are still billions of them out there. Don’t be bought in by all that crap about “It’s old”, “it’s antique”, “It’s rare”.

It’s NOT. Old it may be. Rare? No. Expensive? Certainly not. Valuable? I wish. The vast majority of old sewing machines can be bought for a pittance. You needn’t spend the earth.

What to Buy?

As with anything, the older it is, the harder it is to find replacement parts. Keep that firmly in mind when buying any old sewing machine. As much as possible, stick to big, well-known brands. Market-leaders. And buy wisely.

These are all things that you must keep in mind when you go shopping for an old sewing machine. Now, let’s move onto actually buying a sewing machine…

Buying Your Machine – T.S. Machines

Purchasing a transverse-shuttle machine is bit of a mixed bag. And care should be taken when purchasing one.

Originally, several countries made T.S. machines. The U.K, Germany and America, to name a few. And these used old-fashioned, round-shank Singer-12 type needles, which are almost impossible to find today. If you have a machine which takes these needles, it’s basically an ornament now.

However, in Germany, sewing-machine manufacturers held onto transverse shuttle technology for a lot longer than in other countries, which had moved onto vibrating-shuttle and round-bobbin, rotary-hook machines. They were still producing transverse-shuttle machines well into the 1920s and 30s.

To compete with more modern machines, these old German designs had to be updated. And to do this, they had to swap out the old round-shank needle-bars with modern needle-bars which take conventional, modern-style machine-needles. If you DO buy an old T.S. machine, make sure that it is a later model which is capable of taking modern needles.

(Thanks to Lizzie Lenard for this titbit!)

Buying Your Machine – V.S. Machines

Vibrating-Shuttle machines are very popular. They’re whimsical, cute, they work very well…and they’re extremely old. The vibrating-shuttle mechanism was invented before the American Civil War! So, how do you buy one?

Let’s use my V.S. machine as an example:

My hand-cranked Singer 128k V.S. sewing machine. Manufactured in 1936

I purchased this at the Camden Lock Market in London about a year ago, for fifteen pounds. When I bought it, it didn’t have a base-lid, it didn’t have a key, and it didn’t have a front slide-plate (all of which it now DOES have!). But what do you need to keep in mind?

Vibrating-shuttle machines are the oldest machines which you can still use today. The reason for this is because the vast majority of them will use modern machine-needles, despite the fact that some of them can be over a century old! The style of needle used in most domestic sewing-machines has not changed greatly since the 1880s. As a result, the machine-needles that you buy today will, in most cases, still fit into an antique vibrating-shuttle machine. But there are still a couple of shortfalls.

Further up, I said I’d come back to the issue of vibrating-shuttle bobbins and shuttles. Well, here’s when that happens.

Vibrating shuttles are no-longer manufactured. They haven’t been manufactured since at least the 1960s. But the bobbins which they contain are manufactured as reproductions, on a small scale. And you can buy these online. Try eBay. They follow the generic, Singer-style long bobbin, so they should work with Singer vibrating-shuttle machines like the 27 and 28 series.

Here are a few things to keep an eye out with vibrating-shuttle machines, if you wish to buy one.

Check for Bobbins and Shuttles

Make sure that the machine has at least one shuttle, and at least two bobbins, before you buy it, and that these shuttles and bobbins MATCH THE MACHINE! Shuttles and bobbins are NOT generic, and they are NOT interchangeable!

A Jones shuttle will NOT fit a Singer machine, a Singer bobbin will not fit into a Wheeler & Wilson shuttle. Do not buy a machine with mismatched shuttles and bobbins, hoping that you can just marry them off and everything will work fine – it WILL NOT work fine. Shuttles will jam inside the machine, or bobbins will fall out and tangle up. And you’ll be in all kinds of strife, using language your grandmother would whip you for!

Check the Needle

Most antique vibrating-shuttle machines use modern-style needles, but just to be safe, always check the needle. A modern needle has a thicker shank than it has a tip, and one side of the shank is flattened, so that it looks like a ‘D’. In most cases, you won’t have any problems, but it’s best to be sure.

Check the bobbin-race

The thread’s in the bobbin, in the shuttle, in the carrier, in the race, in the bed of the sewing-machine…in the bed, in the bed, in the bed of the sewing-machine. All together, now…

The race is the little channel underneath the sewing-machine base where the shuttle lives. Open the slide-plates and rotate the balance-wheel until the little steel carriage appears. Press down on the shuttle-tip, and the shuttle should just pop out. Check inside to make sure that the shuttle has a bobbin in it. The machine is useless without these components. You do not need extra shuttles, but it pays to have at least two bobbins, so that you can have at least one choice of thread. Most old vibrating-shuttle machines came with sets of between four, five and six bobbins. Singer 27s came with a standard set of five.

Buying Your Machine – Treadle-Power!

Treadle machines, the old, foot-operated ones which sit on those cute, wooden tables with the wrought-iron frames, are great. But they come with their own issues. Chief among these is weight.

Treadle-operated machines are extremely heavy. If you buy one, you must keep in mind how you’re going to cart the machine and the treadle-table back home. On top of that, treadle-machines require more maintenance – the treadle mechanism must be oiled regularly to prevent jamming. And the drive-belt has to be in good condition, with no knots or frays. And operating a treadle-machine requires quite a bit of hand-foot-eye coordination! To prevent snapping threads, the balance-wheel (and by extension, the drive-wheel on the treadle) must be running anti-clockwise (so that the wheel spins up, over and forwards, TOWARDS you). If it spins the other way, the sewing-mechanism fouls up and the thread snaps.

Buying Your Machine – Hand-Cranked Wonders

Most antique machines are crank-operated. Like my 1936 Singer:

Round and around and around it shall go. Where does it stop? Nobody knows…

Crank-operated machines are extremely handy if you intend to take your sewing machine to places where electricity isn’t available, or where it’s too cumbersome to take your treadle-machine (not that treadle-machines are designed to be moved from place to place!). These are the ultimate in portable sewing-machines.

Crank-operated machines are prized because of their extreme portability. They don’t have any cables or motors or levers or foot-pedals to lug around, they aren’t bolted to a huge, wooden table. They’re just what they are, and that’s what they do. And people love them, because of it!

Crank-operated machines come with advantages of reduced weight, extreme portability, but they deprive you of one hand in the process, to operate the machine. If you’re willing to put up with that, a cranked machine could be for you!

One of the beauties about hand-cranked machines is that they’re surprisingly easy to convert, should you wish to do so. This is yet another reason why they’re extremely popular.

Let’s say you have a vintage electric sewing machine with a dead motor. It doesn’t work, it’s not gonna work, and it’s a waste of time to try and get it working.

But you really like the machine.

Easy. Get out a big screwdriver, unscrew the sewing-motor from the machine (save the bolt that comes off the machine), and chuck it out, along with all the cables and leads and lights and other crap that comes along with it.

Now, get your crank-assembly (either an original antique one, or a modern reproduction, either are available on eBay), and bolt it onto the machine, using the same bolt that held your machine-motor in place. Screw it in tightly with the screwdriver, and then run the crank-arm through the spokes of your sewing-machine’s balance-wheel.

Keep in mind that, although extremely easy a conversion to do, this only works with older sewing-machines with spoked balance-wheels, such as my Singer 128. It will work with solid, non-spoked balance-wheels as well, but it will require you to mutilate your machine by cutting a notch in the wheel, for the crank-arm. You may, or may not wish to do that, depending on how much you love the machine. Alternatively, you can remove the solid balance-wheel, and fit on a spoked wheel, instead.

Buying Your Machine – The Marvel of Electricity

Vintage and antique sewing-machines worked very simply. As a result, it’s surprisingly easy to convert them so that they run off electricity. And a number of machines underwent this conversion in the early 20th century.

Having an electrically-powered machine has many advantages – it’s extremely fast, you have both hands free, you have a sewing-machine lamp to see what you’re doing, and it’s very powerful. The downside is always having to plug the machine in, and having to check the cables. Another potential downside is having to ensure that the electronics on your machine (which can be up to 90 years old, in the case of Singer’s earliest electric machines) are functioning properly. This can be assessed by a sewing-machine repairman, or by you, if you have the necessary skills.

Buying Your Machine – Tips, Tricks, Hints. Dos, Don’ts, Etc. 

Here are some things to consider when you buy your machine, whether it’s cranked, treadled, or electrically powered. Keep the following details in mind when you’re out machine-hunting, and consider them, before you actually pay for any machine that you might be interested in:

Ensure that it takes modern-style needles. This is especially important if it’s an antique vibrating-shuttle machine. In most cases you won’t have to worry, but there are the odd ones out there, where you do.

Ensure that the machine comes with at least two bobbins. You can usually buy more at sewing-shops, or online, but if it’s an older, V.S. machine, it’s not always so easy. Ensure that the bobbins that DO come with the machine fit the machine and work properly!

Ensure that the bobbin-winder mechanism works! Fewer things are more frustrating than trying to wind a bobbin by hand!

Ensure that the clutch-wheel (the smaller knob inside the balance-wheel) engages and disengages smoothly. This switches the machine between sewing-mode, and bobbin-winding mode!

Ensure that the machine-body is affixed FIRMLY to the machine-base/case/treadle-table, and that the case-handle is affixed FIRMLY to the lid! Old wooden cases can rot and crack, and bolts and screws can work themselves loose. If possible, tighten them before you buy the machine! Or tighten them the moment you get it home! The average antique sewing-machine can weigh up to, and over, 30lbs! You do NOT want that falling on the ground, or even worse, landing on your feet! Damage to the machine or case will likely be irreparable!

Ensure that all electronics function properly. Lights turn on. Pedals and leads work. They’re not frayed, bent or cut, melted or cracked! You don’t want to zap yourself when you get home!

DO buy your machine from a market-leader! Replacement-parts for machines (reproduction or otherwise) are usually only made to fit antique machines which are extremely common. If you are buying a machine with a view to getting these missing pieces later on, buy a machine that was POPULAR!

There ARE people out there who manufacture replacement slide-plates, replacement keys, replacement bobbins. But these are usually for Singer machines! Unless you’re very lucky, chances are, they will not work on your obscure little American machine that you found at a country junk-sale. The older, or more obscure your machine is, the harder it is to fix, and the harder it is to find missing parts!

DO check bobbin-winder tires. These things can wear out or dry up and crack. In some cases, they can even MELT into puddles of ugly black goo! Replacements are manufactured, and you can buy them online. If you’re unwilling to do that, existing bobbin-winder tires can be resurrected or have their working lives prolonged by wrapping them around tightly with adhesive tape, to protect the rubber from further deterioration.

DO, if possible, sew with the machine before you buy it. You don’t want to find out when you get it home, that it’s defective and keeps dropping stitches!

DO fiddle around with the machine before you buy it. Turn the crank at high speed, get the wheel spinning and pump the treadle. You want to be sure that there’s nothing that jams up, or breaks or rattles around.

DO open the machine-bed, and have a peek inside. You never know what might be hiding in the basement.

Underneath my Singer 99k.

DON’T worry if the vintage machine you’ve bought (or want to buy) is stiff and doesn’t move! This is an EXTREMELY common problem. And the way to fix it is extremely easy!…and fun! These old machines drink oil. If you don’t lubricate them at least every now and then, the oil dries up and they will eventually jam. And I mean REALLY jam – my grandmother’s 60-year-old Singer 99 was so stiff you couldn’t get it going even if you smashed it with a sledgehammer! If you DO have a machine that’s jammed up, follow my restoration-guide, to get it running again!

DON’T panic if you’ve bought a Singer sewing machine in a bentwood case, and it’s locked…and you can’t get the damn thing open! Yeek!

A 3mm flat-head screwdriver (and maybe, a couple of squirts of oil into the lock) will easily open the case for you. Simply push the screwdriver into the key-slot, and turn it clockwise. This releases the lock. Now, lift up the left side of the case, slide the case to the left (to disengage the lock on the right side), and then lift up, and away! Then, say hello to your machine.

DO make sure that your machine-lid is placed correctly onto the base, and is LOCKED before lifting the machine up by the lid-handle to take it anywhere! You don’t want the machine parting company with the lid and smashing on the ground!

DO oil your machine every now and then, if you use it regularly (regularly means at least once every month). Although very robust, a lack of oil will cause the moving parts to seize up and jam. And then you’ll have a bugger of a time unjamming them again with even more oil.

DO check to see if your machine comes with any attachments! Most machines came with a wide variety of attachments and add-ons. Buttonholers, zigzaggers, seam-guides, hemmers, tuckers, and all other bits and pieces. They’re usually stored somewhere inside the machine-bed, or inside the case-lid.

In most electric machines, boxes of attachments are stored inside the machine-lid (the green cardboard-box on the left).

On most handcranked machines, attachments are stored in compartments underneath the balance-wheel and crank-assembly (green box, on the right). The black steel panel on the left is the cover that goes over the top of the storage-compartment.

DON’T be misled by people who try to sell old sewing machines as “semi-industrial” or “industrial”, and ask an inflated price, just because they can sew through multiple layers of leather or denim. There is a HUGE difference between a domestic sewing machine, and an industrial sewing machine.

This is a domestic sewing-machine

This is an industrial sewing-machine!

Sewing Machines – Care & Feeding

You bought a beautiful antique or vintage sewing machine. Or maybe you inherited one. I inherited my grandmother’s Singer. That’s what got me interested in these things. However you got it, here’s a few things to keep in mind…

Before using your machine, clean it thoroughly and oil it liberally. You don’t want the machine operating with any unnecessary stress or friction. Consult my restoration-guide (see link, further up) about how to do this in detail. Use high-grade machine-oil to lubricate the sewing machine.

Make sure that you put your machine on a sturdy surface! Antique and vintage machines had cases made of wood, and machines made of cast iron and steel. This makes them MUCH heavier than most modern machines made of plastic – it’s a tradeoff that you get with better quality.

That being the case, you do not want to put your sewing machine on a table or bench-top that is going to shake and vibrate when you operate the machine. Not only is it extremely annoying, it could be dangerous!

When not in use, keep your machine covered and locked. This will prevent sun-damage, and will stop things from getting dusty or from components getting lost. But also keep the machine (case and all) out of direct sunlight when not in use. Otherwise, the sun’s rays will damage the finish on the case. Best to keep the machine in a cupboard when it’s not being used.

Sewing-machines are not toys. And antique ones can be surprisingly powerful. Keep them away from kids! If you want to let them fiddle around with it, then at least remove the needle, first! Don’t worry, they’re unlikely to actually break the machine – these things were extremely tough – but they do stand a chance of stabbing themselves with the needle!

Although, you might want to buy a Singer Model 20, if your son or daughter wants a machine all for themselves:

A Singer Model 20. Cute, huh?

These are REAL machines, in the sense that they will sew. They do a simple chainstitch, but the needle never rises up high enough for a child to get his or her finger stuck underneath it. For size-comparison, here’s the Singer 20 with my Singer 128:

Singer 128 (behind), and Singer 20 (front). All Singer 20 machines came with a little clamp, to bolt the machine securely to a table during use.

Conclusion

This concludes my guide in what to look for and how to buy a good vintage or antique sewing machine. Questions or comments are welcome, and feel free to leave them below.


The Night the World Exploded – The Eruption of Krakatoa

In the South Pacific, between the islands of Java and Sumatra, in the midst of the old Dutch East Indies, is a small island called Krakatoa. The name doesn’t mean much today, but during the last quarter of the 19th Century, Krakatoa was the site of an event which rocked the world, figuratively and literally, and which was on the front page of every newspaper within hours. It was an event heard around the world, it was THE news sensation of 1883, it was the Victorian equivalent of the Kobe Earthquake or Hurricane Katrina, or the Indian Seaquake Tsunamis of 2004.

It was the catastrophic eruption of Mount Krakatoa.

This posting looks into the history of one of the most famous volcanic eruptions in the world, and the effect it had on the surrounding populations.

What and Where is Krakatoa?

Krakatoa is a tiny volcanic island between Sumatra and Java in the Dutch East Indies, as they were called back in 1883 when our story takes place. Today, they’re called Indonesia, instead. Its existence, and its volcanic eruptions had been recorded by mankind as far back at least, as the 17th century. The fact that Krakatoa was active again was no surprise to anybody. Legends and fables from the Javanese people, and Dutch colonial records held since the 1600s proved that Krakatoa was a very active volcano. As a result, not many people were that concerned about the fact that the volcano was acting up. It was doing what it did, and that was just how it was. This was normal, and there was nothing to worry about.

How wrong they were.

In May, 1883, Krakatoa was a bubbling, belching, restless monster; but a monster that seemed to be satisfied enough to keep itself to itself. Or so the locals believed. This changed in August of that year, when, on the 27th of that month, one of the largest and most violent, the most destructive, and one of the loudest ever volcanic eruptions in recorded history blew the island to pieces and wiped Krakatoa off the map. It sent shockwaves around the world, literally and figuratively. News of this monumental catastrophe was flashed across newspapers from Shanghai to San Francisco, London to Los Angeles, as fast as electric cable-telegraphy, the quickest means of communications at the time, could send it.

The eruption was one of the deadliest in human history. 36,417 people were killed. How many died in the 79A.D. eruption of Vesuvius? Just 3,000. Just as impressive as the death-toll was the sheer power of the explosion produced by the eruption. The noise and the shockwaves from the event were so loud that they could be heard and felt up to 3,000 miles away!

Just how far is 3,000 miles?

Within that radius, you have…

– Australia.
– Siam.
– Singapore.
– Malaysia.
– Japan.
– China.
– India.
– New Zealand.
– Burma.

And most famously, the tiny island of Rodrigues. Rodrigues is part of the chain of islands that make up the Republic of Mauritius in the Indian Ocean. At a distance of 3,000 miles from the explosion, Rodrigues holds the record as being the furthest distance that the sound of the 1883 explosion of Krakatoa had reached. This, by the way, also makes the August 27th, 1883 eruption the LOUDEST SOUND IN RECORDED HISTORY!!!!!

Now that’s impressive!

What Happened in 1883?

In 1883, the volcanic island of Krakatoa, in what was then the Dutch East Indies (modern Indonesia), was busy erupting. This was nothing new. It had erupted plenty of times in the past. In 416 A.D., and again in 535 A.D. It erupted again in 1530, and yet again in May, 1680. The 1680 eruption was recorded by Dutch sailors based in the Indies. When the eruption was over, they’d even collected chunks of floating pumice to keep as souvenirs!

The eruption of August 26-27, 1883, stands out, however, as being the most destructive eruption of Krakatoa in recorded history, as well as producing the loudest sound recorded in human history.

20-21, May, 1883

The volcano had been erupting steadily for several months during 1883. Small-scale explosions happened all the time, and this was considered normal activity. Life continued as it always had in the Dutch East Indies. As far back as May, there had been earthquakes and minor eruptions, which continued, on and off for several weeks. The most significant earthquakes and eruptions, though small in size, happened in mid-May, continuing, on and off, until June. But then for a while, the island was quiet. For three months, nothing happened. Everyone thought the Krakatoan volcanic eruption season for 1883 had come to an end. People grew complacent and life returned to normal. The only people who paid Krakatoa any interest were the local geologists and pioneering volcanologists, who visited Krakatoa to examine the island. They recorded the atmosphere and the conditions on the ground, making special note of the scalded, scorched, ashy landscape, and the plumes of gas and smoke belching out of the crater. The air was thick, sulfurous, and almost impossible to breathe.

The August 26-27 Eruption of Krakatoa

On the 11th of August, 1883, a Dutchman, Capt. Ferzenaar, stopped at Krakatoa to study the destruction wrought by the May and June eruptions. He noticed great damage and signs of ongoing activity, such as smoke and steam columns issuing from the mouth of the volcano. He advised colonial authorities in Jakarta to suspend any visits to the island in the near future, as a precautionary measure. The authorities would’ve been foolish to ignore his advice.

Capt. Ferzenaar’s warning came in the nick of time. Just over two weeks after his visit, Krakatoa started acting up again. At first, the volcano let off a few, small-scale eruptions on the 25th. Little notice was taken by the locals; this stuff had been going on for years. But the next day, at 1:00pm on the 26th of August, the island exploded!

The blast was mindboggling. All three craters on the island of Krakatoa were firing out tons of built-up rock, solidified magma and ash which had been causing dangerous pressure-buildups inside the volcano for centuries. Ships in the South Pacific area were being pelted by rocks and chunks of pumice up to four inches in size, hitting their decks and bouncing off their deck-house roofs! The earthquakes that followed triggered small-scale tidal-waves that hit the surrounding islands and coastlines that evening. The Dutch East Indies were suddenly not as peaceful and relaxing as they seemed to be!

And the worst was yet to come.

The eruptions continued throughout the day, into the night, and into the next day. Another eruption was recorded at 4:25pm, and still they continued. Ash and smoke blocked out the sun and thick haze coated the entire East Indies region.

On the 27th, the most destructive eruptions took place. At 5:30am, 6:44am, 10:02 and 10:41am, four massive eruptions blew the island of Krakatoa to pieces! The explosions could be heard thousands of miles away and earthquakes rocked the entire Pacific region. Powerful pyroclastic flows, huge landslides of rock, soil, ash, gas and scalding air, devastated the region, obliterating everything in their path: Trees, houses, wildlife and people. Entire communities on the islands closest to the volcano were completely wiped out in a matter of minutes! Huge waves rocked the world as far away as South America, the east coast of Africa, the West Coast of the United States, and even as far north as the English Channel!

This 1888 lithograph print is one of the most famous images of the eruption of Krakatoa in 1883.

The massive shock-waves generated by the volcano rocked the world. Sailors on ships in the Sunda Strait were deafened by the blasts of the explosions. The barometers at the Batavia Gasworks, which supplied the town with gas-lighting, recorded a pressure-jump of 8,500pa, a deviation so extreme, that it went off the scale! The 10:02 eruption produced a sound-wave so powerful and so far-reaching that to this day, it remains the loudest sound ever recorded.

The eruptions that happened on the 27th of August, 1883, were so powerful that they were heard on the remote island of Rodrigues in the Indian Ocean. The sounds were so loud, locals thought they were cannon-blasts being fired by some unseen ship beyond the horizon. Local officials grew so alarmed, they even sent warships out to intercept this mysterious ‘ship’, but it was never found.

Cities and towns all around Java and Sumatra were affected. Ports were wiped out. Ships were thrown inland by the powerful waves. Entire towns were obliterated by powerful tsunamis and pyroclastic flows. There was so much ash in the sky, lights were turned on before midday, as morning turned to night when the sun was blocked out by the tons of ejected ash and soil that were fired into the atmosphere.

The Story of the S.S. Governor-General Loudon

What could be worse than being in Ketimbang, a town on the southern shores of Sumatra, or in Java across the Sunda Strait, and watching the volcano Krakatoa explode before your eyes, blasting millions of tons of rock, soil and ash into the sky? What could be more terrifying than watching gigantic tsunamis surging towards you due to the mountainous landslides and powerful shock-waves generated by the blasts? What could be more unnerving than being in the lantern-room of a lighthouse and watching a towering, 40ft wall of water surge towards you, knowing that you couldn’t possibly escape?

How about being on a tiny little steamship in the Sunda Strait, and getting a front-row seat to the destruction?

This is the remarkable story of the S.S. Governor General Loudon.

The S.S. Loudon was a small ship. Lanched in 1875, it was used for delivering passengers and cargo around the Dutch East Indies. Its captain, Johan Lindemann, was due, on Sunday, the 26th of August, 1883, to steam from Anjer in Java, to Telok Betong, on the southern coast of Sumatra in Lampong Bay. On-board were 100 passengers – Chinese coolies going to Sumatra for work, and curious colonial day-trippers hoping to get a close look at Krakatoa.

Ever since it had started becoming more active, day-trips and sightseeing voyages to, or around Krakatoa, provided by small, local steamships, had become extremely popular. Passengers onboard Capt. Lindemann’s ship paid 25 Guilders apiece, for a ticket, and a chance to see the volcano up close and personal. It was one way for struggling local sailors to scrape together a few more coins on each voyage. The passengers on the Loudon were expecting something amazing – real bang for their buck!

And they wouldn’t be disappointed – The voyage from Anjer to Telok Betong took the S.S. Loudon right across the Sunda Strait. If the passengers onboard stared off the port side of the ship, they would get the view of a lifetime of the most terrifying explosion on earth.

They just didn’t know it yet.

Having picked up its passengers, the S.S. Loudon set a course northwest. It would cut through the Strait and steam directly towards Telok Betong, hugging the coastline as it went. At 1:00pm, the first eruptions started.

Rumbling away for months before, Krakatoa was now ready to explode. And the passengers and crew of the S.S. Loudon were right in the blast-zone.

All afternoon on the 26th of August, the volcano blasted rocks and ash into the air. When the second eruption on the 26th happened, at 4:25 in the afternoon, the S.S. Loudon, its passengers and crew, were among the closest living beings to the volcano. A mere 12 miles (19km) away! Amazingly, there was one ship which was even closer to Krakatoa – The Charles Bal from Ireland – just 9 miles (16km) away. The Charles Bal went down in history as the ship which was the closest to the volcano during its most violent eruptions.

That evening, the Loudon reached Lampong Bay, outside of the port town of Telok Betong. Radio-contact between the port and the ship indicated that it was impossible to dock. The sea was far too rough and dangerous, and the ash and smoke so thick that navigation was almost impossible.

Deciding that it would be suicidal to stay where he was, Captain Lindemann ordered the ship about. At 7:30am on the 27th, after two eruptions had already rocked the ship that day, Lindemann ordered that the Loudon be turned around. It was to make all speed for Anjer. There, they would drop anchor and report their experiences and sightings to the colonial authorities. Lindemann knew that to stay in Lampong Bay was almost certain death. The shallow sea-floor would force waves upwards to incredible heights that could swamp the ship in seconds. They had to get away.

On the 27th of August, the volcano started early. From 5:30 in the morning, there were four gigantic explosions that blotted out the sun, all before midday. Ash poured down like black snow, and the air was charged with electricity. The landslides and shock-waves from Krakatoa set off massive waves that slammed into coastlines as far away as Western Australia and India. And the S.S. Loudon was right in the middle of it!

This is a map of the Sunda Strait. The S.S. Loudon was sailing from ANYER (on the west coast of Java), to TELUK BETUNG, in Sumatra. The ship’s route towards its destination hugged the southern Sumatran coastline. It’s route away from Telok Betong was southeast, hugging the coast, then west to Legundi, then south-southwest, heading for the Indian Ocean, before eventually returning to Anjer. Unfortunately, this escape-route took them perilously close to the volcano of Krakatoa

Ash and rocks pelted the ship. If the ash-buildup on the deck became too heavy and the weight shifted, the entire ship could tip over. The captain ordered all passengers into the hold to redistribute the ship’s weight, and ordered all hands not part of the ship’s essential operations, to immediately start shoveling the ash over the sides.

The continuing eruptions blacked out the sky. It was so dark, the ship could’ve been sailing at midnight. Despite the fact that it was only 10:30 in the morning, Captain Lindemann ordered the ship’s navigation-lamps to be fired up. He wouldn’t risk slamming into another ship in this ashy blackout. They had to get out of here. But trying to send your ship through a volcanic storm to safety is perilous work, and the Loudon faced constant danger from gigantic waves, vicious lighting-strikes and tons of falling ash, which all threatened to sink the ship.

Remember that scene in “The Perfect Storm“, where the fishing boat ‘Andrea Gail‘ tries to ride over a gigantic wall of water?

Imagine doing that with a steam-powered, coal-fired passenger-ship, loaded with passengers, in the middle of a volcanic eruption. Because that’s what the Loudon was doing.

Keep in mind that the Loudon is now sailing south, out of Lampong Bay, hugging the Sumatran coast. With every mile, it must tackle enormous tsunamis generated by the shallow, narrow walls and floor of the Bay. The water is forced upwards to create gigantic swells and waves. To stabilize the ship and lower its center of gravity, Captain Lindemann ordered the port and starboard anchors to be let loose. The extra weight pulling on the ship would hopefully prevent it from being knocked over as it encountered each wave as it left the Bay. Lindemann turned his ship directly towards any waves headed in their direction and ordered the engines All Ahead. Full, to hit the waves with the bow of the ship and not lose precious momentum, which would leave them at the mercy of the sea.

Even as they tried to escape, conditions grew even worse. The powerful volcanic storm blasted hatch-covers off the deck. Anything not bolted down or securely tied to the ship was thrown off in the storm. The mainmast was afflicted with the electrical discharge called St. Elmo’s Fire. The electrically-charged ash which Krakatoa blasted into the atmosphere also caused powerful lighting-bolts to form.

While St. Elmo’s Fire is relatively harmless, lightning bolts are not. In his logbook, Lindemann wrote that he witnessed the ship’s mainmast being struck at least seven times by powerful lightning strikes. Fortunately, the lightning-rod fixed to the top of the mast prevented the ship from catching fire. While the ship was safe from fire, there were still other concerns.

The ash, rocks and thick, gooey, ashy rain that was splattering down all over the ship was making it top-heavy, and the thick, low-lying ash-clouds were making it hard to navigate. Ash was falling so thickly that the crew couldn’t see where the ship was going. And it was rising so fast on the deck that within ten minutes, they were shoveling piles of ash off the ship that were six inches deep!

Twelve inches of ash, rock and mud would be enough to throw the ship off-balance. After that, all it would take was one wave to hit the side of the Loudon, and it would be capsized in an instant.

Deciding that hugging the coast was too dangerous, Lindemann instead ordered the ship out to sea. Tsunamis have less power in deeper water – when they’re near the coast, it’s the sloping shelves of land that force the waves up into the air. Sailing southwest towards the Indian Ocean and safer waters saved their lives.

At least one passenger onboard the Loudon, N.H. Van Sandick, a public-works engineer and day-tripper, recorded his experiences that day. The following are excerpts from his book “In the Realm of Vulcan” (published 1890), detailing what he saw from the deck of the Loudon in 1883.

Describing the morning of the 26th of August…

Clearly the lighthouses of Java’s Fourth Point silhouetted itself against the sky. The Dutch flag on the grounds of the Assistant Resident flapped happily; every house could be distinguished and subconsciously the thoughts wander back to the first arrival in the Indies from Europe. Anjer is then the first place which brings welcome greetings from a distance. If we, who were aboard the Loudon in the roads of Anjer, would have declared that the last day of Anjer’s existence had already begun, we definitely would have been considered deranged…

Describing the volcano, Krakatoa…

When our coolies were aboard, the Loudon set course past Dwars-in-Weg and Varkenshoek into the Bay of Lampong toward Telok Betong. To portside we saw in the distance the island of Krakatau, known for its first volcanic eruption several months ago [May 1883]. Krakatau is an old acquaintance of the Loudon. When, after the first eruption, a pleasure trip was made to see the volcano, the Loudon brought passengers to the island for 25 guilders each. Many landed that time and climbed the volcano; and all experienced a festive and pleasant day.

The volcano on Krakatau gave us a free performance. Although we were far away from the island, we saw a high column of black smoke rise above the island; the column widened toward the top to a cloud. Also there was a continual ash fall. Toward evening, at 7 o’clock, we were in the Bay of Lampong, in the roads of Telok Betong, where anchor was dropped and it soon became night.

Van Sandick goes on to describe how the ship’s crew tried to make contact with the port at Telok Betong, so that they could dock the ship and offload passengers, but no reply was received from the Harbor. The ship lowered one of its lifeboats and sent sailors ashore to examine the situation. They eventually rowed back to the ship, saying that it was impossible to fight the currents, and that the smoke and ash were too thick to see anything.

Deciding that they couldn’t stay where they were, Lindemann ordered the ship about, to return to Anjer in Java. Van Sandick writes of the moment the ship changed course and headed back into the teeth of the volcanic storm:

Suddenly, at about 7 a.m., a tremendous wave came moving in from the sea, which literally blocked the view and moved with tremendous speed. The Loudon steamed forward in such a way that she headed right into the wave. One moment… the wave had reached us. The ship made a tremendous tumbling; however, the wave was passed and the Loudon was saved. 

Another ship, the P.S. Berouw, was not so lucky. The tsunami that wiped out the harbour at Telok Betong hoisted the paddle-steamer and its 28 crew-members into the air, and threw it inland. This sketch of the ship was made after the waves receded. The ship is wedged across a river…two miles up from the coast! 

Steaming away from Telok Betong, and watching the harbour behind them being smashed to pieces, Van Sandick then described what happened when the ship sailed once more past the volcano, attempting to reach Anjer:

Meanwhile we steamed forward and soon the roads of Telok Betong were lost from view, and we hoped soon to be out of the Bay of Lampong. But we would not get away that easily. It became darker and darker, so that already at 10 a.m. there was almost Egyptian darkness. This darkness was complete. Usually even on a dark night one can still distinguish some outlines of, for instance, white objects. However, here a complete absence of light prevailed. The sun climbed higher and higher, but none of her rays reached us. Even on the horizon not the faintest light could be seen and not a star appeared in the sky.

This darkness continued for 18 hours. It is self-evident that the Loudon during this pole-night had to “winter over” in the bay. Meanwhile a dense mud rain fell, covering the deck more than half a meter thick and penetrating everywhere, which was especially bothersome to the crew, whose eyes, ears, and noses were liberally filled with a material which made breathing difficult. Off and on again, ash and pumice fell. The compass showed the strangest deviations. Fierce sea currents were observed in diverging directions. The barometer meanwhile read very high, which certainly was difficult to explain. Breathing, however, was not only made difficult by ash, mud, and pumice particles, but the atmosphere itself had also changed. A devilish smell of sulphurous acid spread. Some felt buzzing in the ears, others a feeling of pressing on the chest and sleepiness. In short, the circumstances left something to be desired, since it would have been quite natural if we all had choked to death.

Captain Lindemann’s actions on the 27th of August, 1883, saved the lives of everyone onboard. Staying away from land and powerful tidal-waves, attacking waves head-on and redistributing the ship’s weight to lower its center of gravity to prevent capsizing had all contributed to the eventual safe deliverance of everyone onboard the S.S. Governor-General Loudon.

Sailing out to sea into deeper water ensured the ship’s survival. Once the Loudon made landfall, everyone was offloaded safely. Capt. Johan Lindemann was eventually awarded by the Dutch colonial authorities, and given a medal for his bravery and courage in the face of incredible dangers. He died in 1885.

Remember the unfortunate P.S. Berouw? This is all that remains of it:

This is the Berouw’s mooring-buoy. When the Telok Betong Tsunami hit, the ship was ripped from its buoy and thrown inland. The buoy itself was carried with it. It remains where it was found, and was later used as a sculpture in a memorial to the Krakatoa dead.

…It’s now in the middle of a traffic roundabout.

Effects of the Eruption

The official death-toll, as recorded by Dutch authorities in Indonesia, was 36,417. This was due to a mixture of tsunamis, pyroclastic flows, shockwaves, and falling volcanic debris. The eruptions sent debris charging up into the sky, to a height of 20,000ft (to put this into perspective, commercial aircraft fly at around 30,000ft). Ships all around the world were rocked by powerful waves caused by the earthquakes and shockwaves generated by the eruptions. 11,000,000 cubic miles of ash, rock, soil and magma had been blown into the sky, blocking out the sun around the Dutch East Indies for three days.

165 villages, towns and settlements were destroyed, including Telok Betong, a town in southern Sumatra called Ketimbang, and the Fourth Point Lighthouse, on the west coast of Java (mentioned in Van Sandick’s book). Here, despite the fact that the lighthouse was ripped off its foundations by a colossal chunk of coral weighing several tons, the lighthouse-keeper somehow survived. Today, the only thing that remains of the original Fourth Point Lighthouse is its foundations, but another lighthouse, built just a few yards away, was opened just a couple of years later.

Photographed in 1883, this massive chunk of coral was scraped off the seabed and dumped on the western coastline of Java during the eruptions of Krakatoa. It’s believed a chunk similar in size to this, smashed into the Fourth Point Lighthouse, ripping it off its foundations.

The shock-waves from the eruptions circled the globe, bouncing off coastline and mountains and reverberating and reflecting and intensifying and returning. The tsunamis and sound-waves rippled around the globe seven times, before they died down.

For weeks and months after the eruptions, bodies and skeletons washed up on beaches throughout the Pacific area. Some even floated across the Indian Ocean, ending up in Africa!

Rogier Diederik Marius Verbeek

Rogier Verbeek (1845-1926) was a Dutch geologist, scientist, and a pioneer in the field of volcanology – the study of volcanoes and their effects. In the 1880s, Rogier was living in the Dutch East Indies. As one of the most volcanically active places on earth, where better to study volcanoes?

As an active volcano, Krakatoa was naturally of great interest to Verbeek. He set himself up in the Javanese town of Buitenzorg (today, Bogor, Indonesia), a good 100 miles from the volcano. He considered this to be a safe-enough distance from danger, but still close enough to watch the volcano.

His accounts of the volcano, and of its legendary 1883 eruptions became bestselling books in the scientific community of the late-19th century. His journal on the subject made him a celebrity, and brought volcanology into mainstream scientific studies for the first time. His records of the disaster gave scientists all over the world rare, valuable, first-hand insights into the power and the various stages of volcanic eruptions.

The Strange Story of Edward Samson

One of the most famous stories about Krakatoa is not about how many people died, or how loud it was, or how big the eruption happened to be. It’s about a man. A man named Edward Samson.

Whether or not this story is even true is uncertain. It’s been repeated ad nausea throughout the internet, in history-books, and even on TV shows about unexplained events, for at least thirty years. I’ve searched throughout the internet and through documentary films and books…is it real? Maybe. At any rate, it makes a hell of a story. And it goes like this…

Edward Samson was a journalist. He was the news editor of the Boston Globe, an American newspaper based in Boston, Massachusetts, in the United States. One night, Samson, bored, a bit drunk, sleepy, and without a story, passed out in his office. In the midst of his slumbers, he had a fantastic dream: He imagined a tropical island paradise; an equatorial dreamland named ‘Pralapae’. He dreamed of a powerful volcanic eruption, that in the space of a few hours, had decimated the entire island. Suddenly, Paradise had been transformed into a hell of raining fire and ash, choking smoke, powerful earthquakes and rocks and lava all around. He imagined thousands of people dead, all of them variously scalded, drowned, buried alive, or blown to pieces in the disaster.

When Samson awoke, he wrote the whole thing down. His dream…for what else could it possibly be?…was so vivid that he felt that he had to record the whole thing. He didn’t know what else to do! Perhaps he could sell it to a magazine as a short story? Or put it in the newspaper and publish it as a piece of fantasy? He punched out the whole account of his vivid volcano vision on his typewriter, rang the thing off, ripped it out, stacked it up on his desk, and then staggered home to sleep.

When he awoke, fresh and sober the next morning, he picked up a copy of the Boston Globe. He was horrified to find that his work of fiction had been taken as fact! The Editor of the Globe had plastered it right across the front page!

Panicking, Samson ran to his office to explain that the story on his desk was merely meant as a piece of fiction, but the ball was already rolling. The story was going to be retracted, and an apology printed to readers of the Globe, when telegrams flooded in from around the world – Singapore, Shanghai, Melbourne, San Francisco…a catastrophic series of eruptions in the Sunda Strait in the Dutch East Indies had devastated the region, wreaking havoc and obliterating an island volcano called Krakatoa.

That night when Samson had passed out and had his dream, was the 25th of August, 1883. Had he really had a premonition of the most famous volcanic eruption in history?

Whether or not this story is true is up for debate. The eruption is certainly true. And the Boston Globe is a real American newspaper – it was first published in 1872, and certainly existed at the time of the 1883 eruption. But was there ever a famous, premonition-fueled front-page volcanic sensation?

Unless anyone ever manages to go through the Globe’s archives and checks the headlines for the 25th-31st of August, 1883, for mentions of a volcanic eruption on Krakatoa, or Pralapae, we may never know.

More Information?

Mr. Van Sandick’s book, “In the Realm of Vulcan” (pub. 1890). Chapter detailing the voyage of the Loudon

Van Sandick’s book was originally published in Dutch, and has been transcribed onto the internet in that language. Use Google Translate to translate it into English if necessary.

Eyewitness Accounts of Krakatoa. Capt. J. Lindemann, and Mr. Van Standick’s report and book-chapters are accounts No. 2 & 3.

Documentary: Krakatoa – The Last Days (AKA Krakatoa – Volcano of Destruction). 

Documentary: Krakatoa

The Volcanic Nightmare

The Day the World Exploded – This link provides some interesting information about the ships in the Sunda Strait at the time of the 26-27th August eruptions.


Tinkering with a Typewriter – The Underwood No. 5 Standard – POST NO. 3.

The Underwood undertakings continue…

The next step in this saga is to resurface the platen. The platen is the fat, round cylinder which the paper wraps around when you feed it into the typewriter. It’s also the impact-point of all those hammer-blows when you type. So its restoration is essential to the smooth running of the machine.

The exterior diameter of the platen and rubber is 45mm. 

The interior diameter of the platen, sans rubber, is 42mm. 

Therefore, the thickness of rubber required on the platen is 3mm. 

This is harder to achieve than you might imagine.

The first step is to remove the platen from the typewriter, explained in my previous posting on this topic.

Having removed the platen, it was then necessary to break off the old rubber. I did this quite effectively using a flathead screwdriver. I broke off the old glue which had crusted up around the edges of the platen, forced in the screwdriver-blade, and started jemmying away, levering the dried rubber up, and breaking it off as it came away from the cylinder underneath.

If you should intend to do this to your own machine, BE WARNED:

Early typewriters have platen cylinders cored with WOOD, not steel. Do NOT use anything overly sharp, that will gouge out or dig into the wood and cause it to crack or splinter. Otherwise you’re stuck doing even MORE work. That’s why I picked a blunt-point instrument like the screwdriver.

Resurfacing the Platen

To resurface the platen, you need fresh rubber tubing. If you’re lucky, you can find this at a hardware shop, a rubber-supply shop or other similar establishment.

However, specialty rubber like this is not as common in some places as once it was. Here, you must be creative.

There are two options available to most people:

1. Heat-Shrink Tubing. Easily purchased at electronic-supply shops and hardware stores, this stuff comes in a variety of widths, from a few milimeters, to several inches wide. If you have wide-diameter heat-shrink tubing on hand, buy some of that, along with the smaller sizes, to do both the platen, and the feed-rollers.

2. Bicycle Inner-Tubes. I wasn’t lucky enough to find extra-large heat-shrink tubing locally, and ordering it online was prohibitively expensive. However, there is another alternative. Not many people use and restore typewriters anymore, but fortunately for us, lots of people still go…cycling!

Every bicycle must have inner tubes which expand and hold air inside the tires. Nip down to your local bicycle-shop and ask about the largest-diameter tubing that they have available. This is a bit of a hit-and-miss affair, and it’s not nearly as neat and easy as using heat-shrink tubing, but it does work, and other restorers have gone down this path with success.

The tubes that you get need not be brand-new. If the shop is the kind that does in-house repairs for customers, chances are, they’ll have a whole bin or crate of used, punctured tubes lying around. Fish around in there until you find what you’re after.

Having found the right size/s (you may need more than one) of tubes, new or used, take them home and cut them open at the nozzle so that you have the longest length of tube available. Measure and cut the tube to the length of the platen. Also: Curl the tube inside-out. This will expose the SMOOTH inner-inner tube to the surface, which is better for the typewriter. Bicycle inner-tubes are filled with TALCUM POWDER to stop them sticking. You may have to dust or wash this off once the tube has been pulled over the platen.

Next comes the process of resurfacing the platen.

Having removed all the old rubber with care, ensure that the platen CORE or CYLINDER is free of imperfections and damage. Now, start layering heat-shrink or rubber tubing onto the platen.

If you have heat-shrink tubing, this should be much easier. If you have to do it with rubber tubing, it may be more fiddly and time-consuming, but it is possible. You may want to heat the rubber to expand it and make it more flexible while stretching it over the platen-core.

TIP: When removing the old rubber from your platen, keep the ends of the old rubber sheathing intact. This will serve as a guide about how thick to make the new platen-covering. 

An Interesting Observation

During my resheathing adventures involving the feed-rollers and the platen, I noticed that the shift and shift-lock mechanisms on the typewriter seemed to be malfunctioning.

I almost had a panic-attack! I didn’t come THIS far to screw up now! What happened!? What’d I do!?

The carriage kept jumping up and sticking in shift-lock mode, and I couldn’t figure out what was wrong. I decided to sleep on it and mull it over in the morning.

Taking a Holmesian approach, I examined all the evidence and analysed my movements, thinking about what I had done, changed or removed on the typewriter. I also examined the shift-mechanism itself to see how it operated.

As Holmes said: “Whatever remains, however improbable, must be the truth“.

The only truth I could think of was that I had removed the platen, and that, judging from the construction and operation of the shift-mechanism, the entire thing was weight-tensioned.

On a hunch, I dropped the platen-core back into the typewriter. Bingo!

As I suspected, the shift-mechanism works ONLY when the platen is in position. The added weight of the platen is what keeps the springs that operate the shift-mechanism in correct tension. Boy was that a relief!

Once the platen is fully resurfaced (it’s taking a while), another post will follow.


Tinkering with a Typewriter – The Underwood No. 5 Standard – POST NO. 1

Yesterday I went to a huge antiques center and moseyed around. While there, I found an Underwood Standard No. 5 typewriter…Which I did not buy.

I did not buy it because I wasn’t convinced it was worth it. Given its condition and the price wanted for it, I couldn’t justify coughing up the cash and lugging the thing home.

Fast forward twenty-four hours, and while at my local flea-market, I spied for sale, one…Underwood Standard No. 5 typewriter!

What’s the chances of seeing two in two days?

This typewriter was in better condition, mechanically and cosmetically (which is saying a lot, when you see it). It had a few issues with it, which I was sure I could repair. So I got it for a decent price, and wheeled the thing home.

It’s currently on a table in my room, being restored.

You’ll notice at once that there’s a few issues with it. All the rubber needs replacing, the spacebar has to be glued back together, the right platen-knob is missing (I wonder if I can fix that somehow…) and it needs a damn good cleaning!

I spent most of the day working on this thing. And what a thing it is!

It weighs exactly 28.5lbs. It certainly ain’t light! The entire frame is cast iron, painted black. The mechanism inside the machine is in, so far as I can tell, perfect working order, barring the necessity for a serious cleaning. Once it’s cleaned and repaired, I’m confident that it’ll work significantly better.

The typewriter needs a lot of work. Here’s what has to be done:

– New rubber EVERYWHERE.

I had hoped that the platen was salvageable, but it doesn’t look like it. Heat-shrink tubing and rubber tubing or piping works best for applications such as this. I’ll have to remove the rubber from the paper-bales, the platen, and the feed-rollers underneath. None of the rubber on this machine is the least bit usable. Not even the feet underneath – they’ll have to be replaced as well.

– The space-bar needs to be glued back together.

I had considered replacing it, but I’ll only do that if the gluing doesn’t work first. It’s a relatively simple operation.

– Everything needs cleaning.

This is a very long, dirty and fiddly process. Recommended equipment: Needle-nosed tweezers, watchmaker’s bulb-puffer, flashlight, cotton-buds, tissues.

– Typing Mechanism requires Cleaning.

Methylated spirits in a bowl, and a brush to wash it through the machine. This is easily the most time-consuming part of restoring this machine. It can take days to do it properly.

– Everything needs lubrication.

Break out the sewing-machine oil. This thing needs hardcore lubrication. I oiled the tab-stops, the margin-stops, and anything else on this thing that moves. Normally oil isn’t recommended, due to its dust-catching properties, but when you’ve got a machine in front of you that hasn’t been used in 30-40 years, oil is the only thing that will free-up all the mechanisms that have frozen or jammed.

I even oiled the screws before I started pulling anything apart.

The Underwood Standard No. 5 Typewriter – A Profile in Print

I’ve been after a desktop typewriter (in their day, also called standard, or office typewriters) for a while. And the Underwood 5 was one of the main machines on my hit-list.

The Underwood 5 came out in 1900. Preceding it were the Underwood 1, 2, 3, and 4. All the machines were more-or-less the same, but with small changes and improvements made along the way. For example, the Underwood 3 is unique among Underwoods as coming with extra-long carriages as standard. Anywhere from 14 to 16 inches, all the way up to a foot or more!


This Underwood Standard No. 3, from 1923, has a carriage that’s over three feet long! 38 inches! It’s designed for typing out material for accounting ledgers. Photograph from Machines of Loving Grace

The No. 5 is famous for a number of reasons. First, the sheer quantity produced. Nearly four million of them in over 30 years of production.

Second, the quality of construction. This machine is 86 years old. It’s been unused for at least 40 years. It’s caked in crap and everything on it that can perish, has perished…but it’s still in essentially working order.

Name me something made today that’ll still work in 86 years’ time. Apart from cutlery, I can’t think of anything.

Third, the ease of use. Early typewriters were something of a hit-and-miss thing. You had downstrikes, sidestrikes, thrust-action, upstrikes, blind-writers, pocket typewriters…the Underwood Standard series was one of the first typewriters that took the best and most sensible innovations and put them all into one machine. The Underwood Standard was sturdy, strong, and pretty easy to operate.

You could type on an Underwood Standard at high speed without fear of anything jamming up or breaking. You could SEE what you were typing (not true of all machines of the era), and even when it wasn’t doing anything – it sat on your desk looking cute. Again, not something that could be said of other machines of the era.

The Underwood Standard had a famous, open-frame design. Originally a cost-cutting measure, it’s kinda like a skeleton watch – you can see everything working inside the typewriter. Cool, huh? It also makes cleaning it and checking out how things work, much, much easier!

In the 1910s, Underwood famously built a giant-sized Underwood No. 5 as a marketing gimmick. Yes, it’s a real typewriter, yes, it really did type! It was used to type out the daily attendance-figures of those who came to gawk at it, during the World’s Fair! 

The Underwood No. 5 was produced from 1900, all the way to ca. 1933. In that time, Underwood became a household name for typewriters, much like Royal, Remington, L.C. Smith, Corona, Woodstock, Olympia, Continental, and other famous manufacturers.

Back to My Typewriter…

The Underwood 5 came with a number of nifty little features, such as the fold-away paper-stay…

…the steel bar that sticks out, between the two ribbon-spools.

Manual ribbon-adjustment wheels, seen below, on the bottom left of the frame:

Margin-stops with ruler, at the front (on most typewriters, these things are at the back):

If you’ve never used one of these things before, then the margin-stops on the Underwood Standard will trip you up a bit – The LEFT stop controls the RIGHT margin (and therefore, when the bell rings). The RIGHT stop controls the LEFT margin (and how far back you push the carriage for each line). The settings of the stops correspond to the cursor and arrow which you see in the middle of the scale, sticking out of the carriage. On most typewriters, it’s left-stop, left margin, right stop, right margin – Not here!

Behind the typewriter, where the margin-stops usually are on other machines, we have the tabulation-stops, instead! Five in total:

These can be adjusted along the tabulation-rack to set predetermined indentations for sub-headings, lists, etc. Tabulations are operated from the front of the typewriter using the Tabulation Key (today called the ‘Tab’ key). It’ll run much more smoothly once I’ve replaced the crumbling rubber feed-rollers. Right now, the deteriorating rubber is jamming the mechanism.

At the bottom of the frame, you can see the long list of patent-dates:

Also on the Underwood, you have the handy seesaw ribbon-selector:

In that photograph, it’s currently set to “RED”. Pressing it down the other way, would set the machine to BLACK. A lot easier to use (and see!) than on some machines where the ribbon-selector is just some tiny little nub sticking inconspicuously out of the corner of the machine.

On the very left of the machine, you’ll see the margin-release button. It’s on the same level as the ribbon-selector. It’s in the same position on the much smaller Underwood Standard PORTABLE.

This machine was built in late 1927. It is Underwood Model 5, serial no. 2,284,724!

2,284,724…that’s a lot of Underwoods!

I wonder where the other 2,284,723 machines are?

As my restoration journey on this typewriter continues, I’ll update this story with future postings.


What’s That Tune? The Stories Behind Famous Pieces of Music – No. 2

Title? “The Danse Macabre”
Who? Camille Saint-Saens.
When? 1874
What? Symphonic Poem

The Danse Macabre (the first word spelt with an ‘s’), is a medieval allegory; a representation of the universal nature of death. In the Middle Ages, when death was everywhere, and few people were expected to live beyond their mid-thirties, the theme of all-encompassing death was a grim comfort to the peasant classes. As dismal and short as their lives would be, they knew that sooner or later, even the great kings and lords would also follow them into their own graves, and that wealth, riches and power did not spare one from the scythe of the Grim Reaper of Death.

The actual ‘Danse Macabre’ or ‘Dance of Death’ is an ancient European superstition. It holds that every year, on the night of All Hallows’ Eve (“Halloween” in modern English), the Grim Reaper calls the souls and skeletons of the dead from their graves, to lead them in dance and merriment, from strike of midnight until break of dawn. This was another way of softening the harsh realities of life and death, and providing people with the belief that death, while universal, couldn’t possibly be so bad.

The Danse Macabre as written by French composer Camille Saint-Saens in 1874, is the most famous of the many musical representations of Death leading the spirits of the dead in dance on Halloween. Although this piece can be played on the piano, it was actually written for a full orchestra.

The piece starts with the twelve strokes of midnight. As the church-tower rings the last bell of midnight, Death enters a graveyard, tapping and knocking on all the gravestones, to rouse the dead from their slumber. The wavering, continuous melody throughout the majority of the piece (in orchestral arrangements, performed by a solo violin), represents the personification of Death dancing through the churchyard, playing his violin, with the ghosts and skeletons of the dead dancing around after him.

The piece ends several minutes later, with the gradual rising of the sun, the rooster’s crowing, and the souls and skeletons of the dead crawling back into their graves, to await the Halloween dance of the next year…

Title? “Omphale’s Spinning-Wheel”
Who? Camille Saint-Saens
When? 1872
What? Symphonic Poem

Who knows what evil lurks in the hearts of men? Muahahahahaha!

The Shadow knows…

Composed in 1872, this is another of Saint-Saens’ most famous pieces. Another symphonic poem, it’s known to modern audiences mostly for the bridge in the middle of the piece, which was used in the 1930s radio program, “The Shadow”.

If you’ve ever wondered about the origins of that famous, slow, haunting theme, it came from here. In the video provided above, it starts at 3:22. It was performed on organ, for the radio-program by legendary organist Rosa Rio, who died in 2010…at the age of 107! 

Title? “Funeral March of a Marionette”
Who? Charles Gounod
When? 1872
What? Piano Solo

Fans of Alfred Hitchcock will probably recognise the slow, steady, rocking pace of this music as the theme to the 1950s TV series “Alfred Hitchcock Presents…“.

Composed in 1872 by Frenchman Charles Gounod (“Gouno‘”), also famous for “Ave Maria“, it was originally written as a piano solo, but was rewritten in 1879 as an orchestral piece. Hitchcock selected it as one of the pieces of music he would have a recording of, if he were trapped on a desert island.

Title? “Powerhouse”
Who? Raymond Scott
When? 1937
What? Novelty

Anyone who grew up watching Warner Brothers cartoons on weekend television will be familiar with the 1930s novelty tune “Powerhouse“, by Raymond Scott and His Orchestra.

Scott was famous for his whacky, novelty tunes which were highly popular in the 1930s and 40s. He used a lot of early electronic instruments to produce the weird sounds for which his music is famous. “Powerhouse” is best known for the bridge in the middle, with the slow, methodic, “Assembly-line” theme. It starts about a minute and a quarter, into the original 1937 recording, which is shown above.

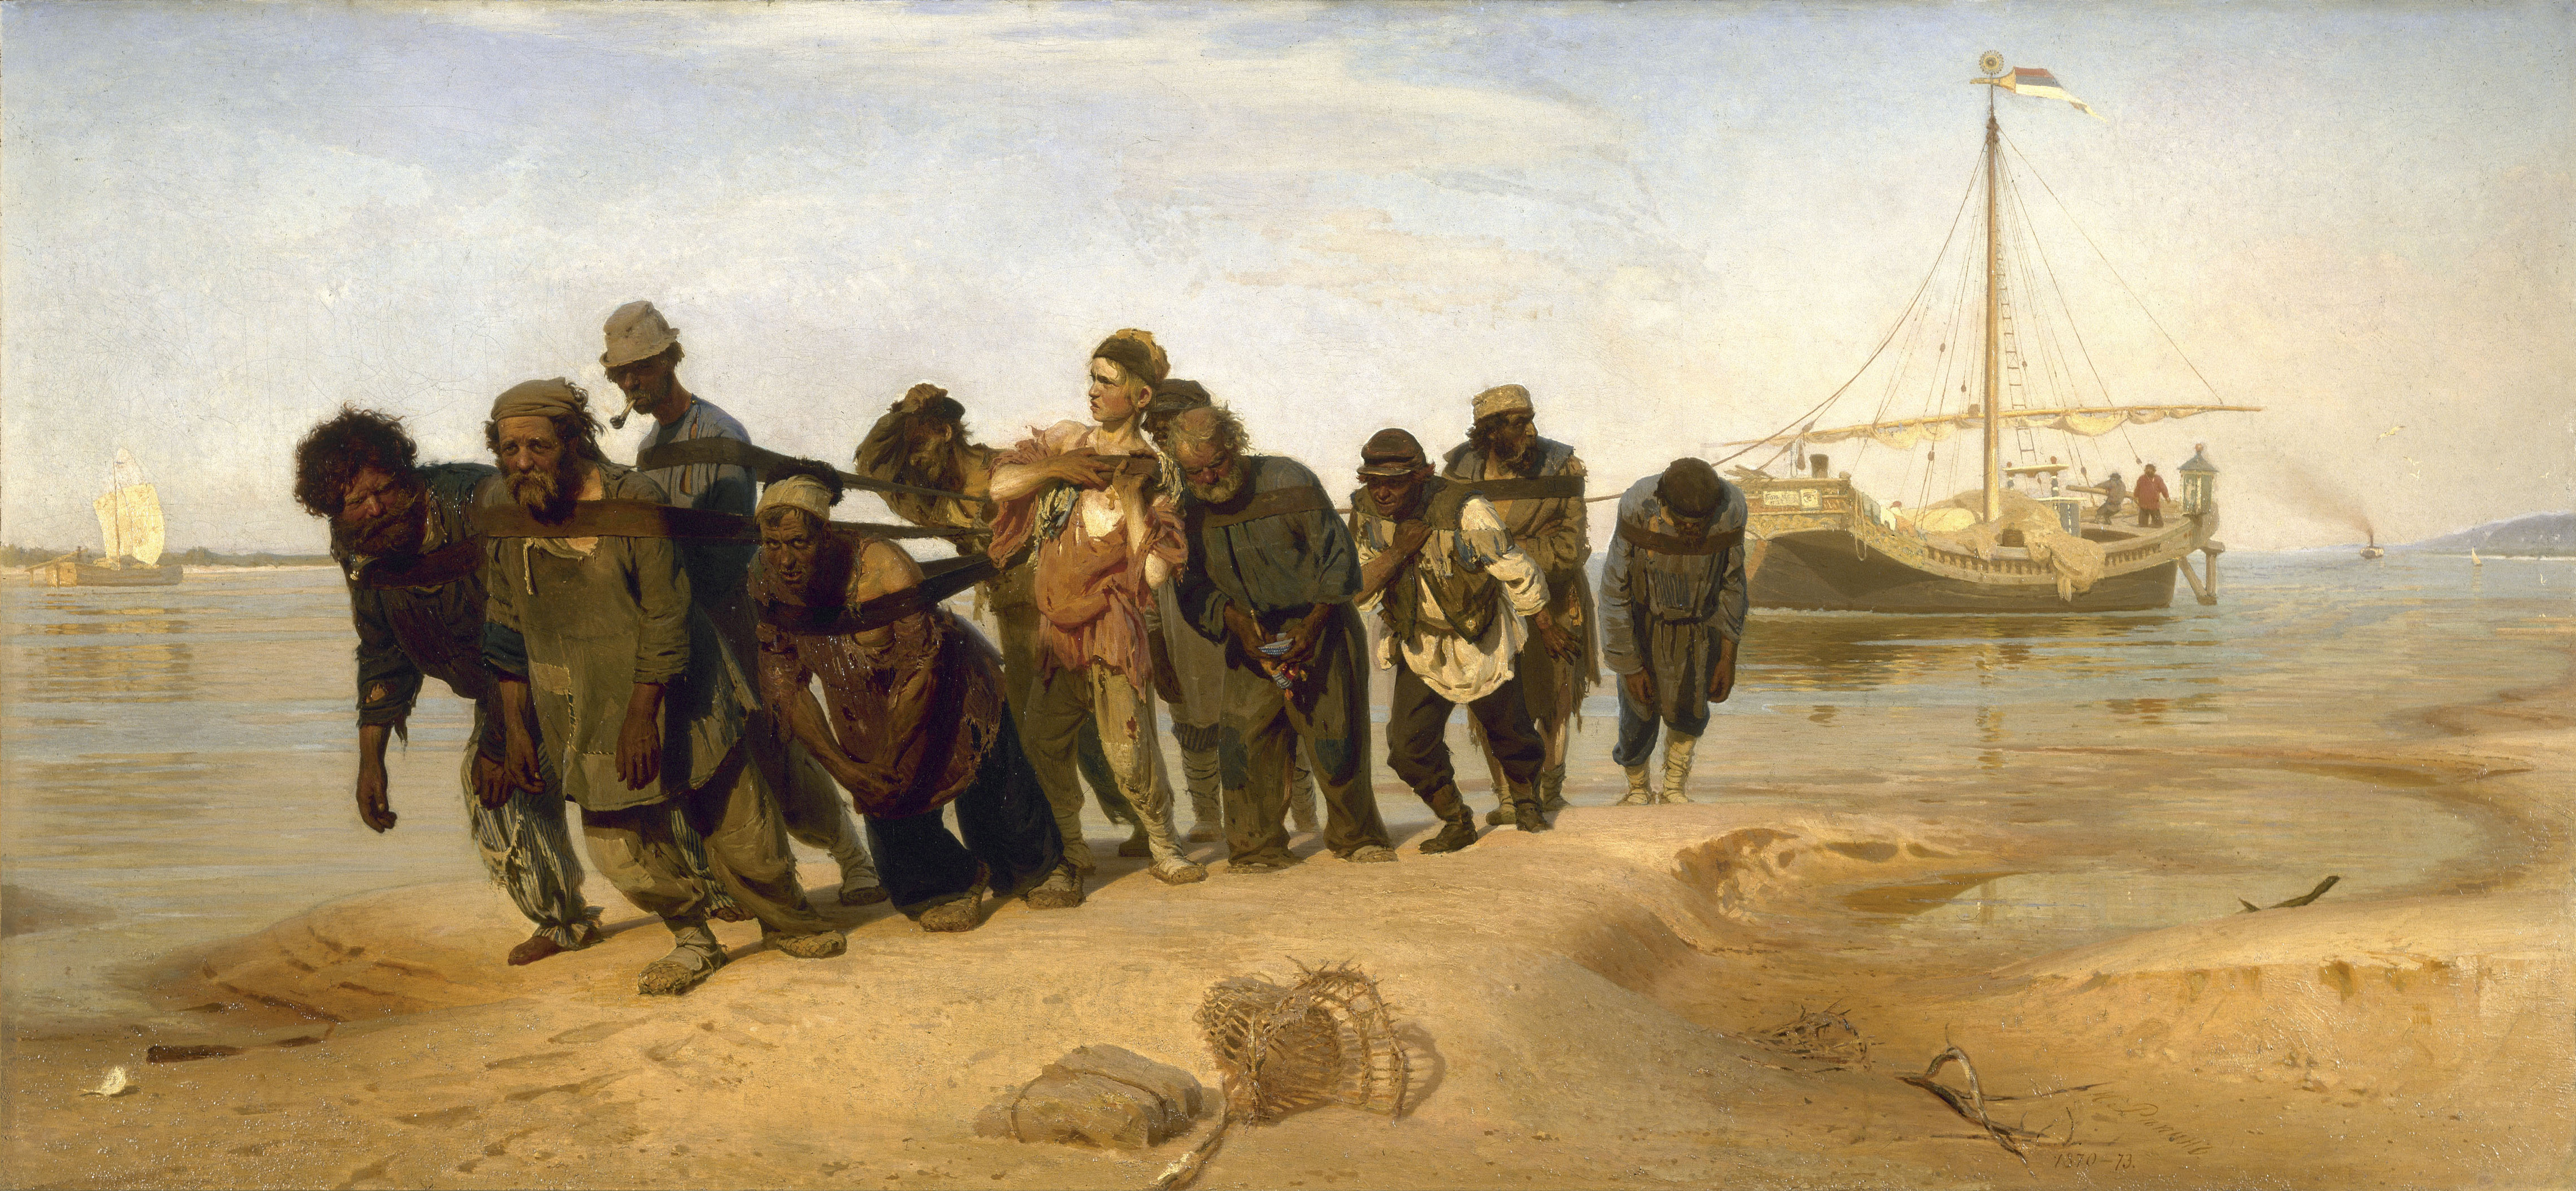
Title? “Song of the Volga Boatmen”
Who? Unknown. Compiled by Mily Balakirev.
When? Unknown. Published by M. Balakirev in 1866.
What? Traditional Russian Folk-Song

Anyone who grew up watching Disney cartoons of the 30s and 40s is probably familiar with this ancient Russian folk-song, ‘The Song of the Volga Boatmen‘. Its origins are lost to history, but it was saved for posterity by Russian pianist and composer Mily Balakirev (1837-1910), who added it to his published book of traditional Russian folk-songs in the 1860s.

Barge-Haulers on the Volga (1873), painted by Ilya Y. Repin

The original lyrics tell the story of the Volga Boatmen, teams of peasant labourers who dragged barges and boats along the Volga River in Russia during the time of the Russian Empire. This backbreaking, thankless task worked many poor Russian peasants into their graves, but the song (used to help keep time during barge-hauling) was inspirational for its depiction of hard work and determination, and remained popular, even through the communist era of the 20th century.

The Volga is the longest and largest river in all of Europe, and runs through the hearts of many famous Russian cities, such as Moscow, and Volgograd (what used to be known as ‘Stalingrad’ during the Second World War).


Now Boarding: A History of Airports

Every day, hundreds of thousands of people travel through airports and millions of people travel by airplane. You grumble and bitch and complain about everything, don’t you? It’s far to walk, your bags are too heavy. You can’t take this, that, the other, and another thing, onto the plane. The gates and terminals are miles apart and you’re running late. Security-checks, baggage snafus, X-rays, immigration, and that endless standing and watching and waiting and walking and running…and at all possible hours of the day and night!

Airports are such a pain in the ass.

So, who do we have to blame for this nightmare? While you’re waiting for that flight which is three hours late, and which will last twelve hours from London to Singapore, why don’t you sit back and find out about the history of airports?

Before Airports

From the 19th century up until the 1950s and 60s, almost all international travel was done by railroad or ocean-liner. You rode in comfortable and luxurious Pullman cars across the vast expanses of the United States. You rode the Orient Express across the Continent. From ports like Southampton, New York, Melbourne, Sydney, Shanghai, Singapore, Hong Kong, Calais, Port Sa’id, Tokyo and Bombay, your ship or ocean-liner took you all over the world. Shipping lines such as the Hamburg-America, White Star, Red Star, French, Nippon Yusen Kaisha (better known as the NYK Line) and Pacific & Oriental (better known today as P&O) were world-famous, and shipping lines were all in direct competition with each other to grab as big a slice of the customer pie as possible.

Ports and railroad stations were major hubs. Victoria Station in London, Victoria Harbour in Hong Kong. The Port of Shanghai, New York Harbor, Grand Central Terminal, Union Station, King’s Cross, Paris Gare du Nord, Victoria Dock in Melbourne; all names which were once as familiar to us today as United Airlines, Qantas, British Airways, Singapore Airlines, and Pan-American.

We think that the Golden Age of Travel, the era when international large-scale passenger transport was possible for the first time, was confined solely to smoke-belching trains and ocean-liners, but even in the 1910s, airplanes and airports were beginning to make a name for themselves. And this is their story.

The Airfield

Starting in the mid-1910s, airplanes started becoming a serious form of transport. The First World War saw the first large-scale use of airplanes, for bombing, reconnaissance, artillery-spotting and the most thrilling of all – aerial combat – dogfights!

But what to do when the war was over?

Yes, airplanes had proved their worth, but for the large part, airplanes were still very experimental – most of them were made of nothing but wood and canvas, with struts and wire stays to hold the whole flimsy thing together.

But with the end of the war, there was suddenly a surplus of planes…and skilled pilots…who were suddenly out of a job!

So began the first experimental passenger flights, in the early interwar period.

With the first flights, came the first ‘airfields’.

Early airfields were nothing fancy – quite literally a field, with precious little besides, and usually belonging to, or purchased from a farmer. Fields owned by farmers were of necessity, flat, smooth, dry, and free of stones, tree-stumps and other impediments; ideally suited for aircraft landing. There were no terminals, no control-towers, not even any runways to speak of – nobody envisioned that air-travel would be used for anything more than the delivery of mail, anyway!

Early airfields were simply open fields…with grass. Handy for landing, not so great for taking off. Grassy fields created drag on the undercarriage and landing-wheels of early aircraft, which inhibited takeoff. Things were improved slightly when someone got out the lawnmower and the grassy field was replaced by dirt runways, but even these had issues – in wet weather, dirt runways turned to roads of sludge, making it impossible to take off, or land! It was clear that proper aircraft-handling facilities were required.

So when and where did the first airports pop up?

The World’s First Airports

The oldest airport still in operation was built so long ago, it was barely older than the machines it was built to handle! Opened in 1909 by Wilbur Wright, the College Park Airport, in Maryland, the United States, is the oldest airport in the world!

Originally, the College Park Airport was a training-ground, for the Wright Brothers to show off their new invention – the airplane! But by 1911, it had become an established airport, with wealthy civilians using the area to land and house their own machines. Among other historic events, College Park saw the first experimental helicopter test-flights in the 1920s.

In the postwar period of the 20s and 30s, large-scale passenger transport was still done with ocean-liners and steam-trains. But eventually, airlines started being formed, and they blossomed into the companies which we know today.

In Australia, a company called the Queensland And Northern Territory Aerial Services commences operations in 1921. In 1926, Germany establishes Deutsche Luft Hansa (three words). The same year, Northwest Airways is established…wasn’t that in a movie somewhere, starring Cary Grant?

A year later in 1927, in the United States, something called Pan American World Airways first takes to the skies, in 1927 with its famous seaplanes.

In Europe, where there was an established flying culture because of the First World War, and where short distances between countries made early passenger flights practical, the first airports were established.

In 1927, Tempelhof Airport was built near Berlin. Around the same time in England, land near an old race-course is used for aerodrome purposes. In 1930, it will become the famous London Gatwick Airport.

The old Tempelhof Airport, Berlin

Early Airlines and Airplanes

Aerial services were slow to catch on in the United States. With such vast amounts of land to cover between major cities from state to state, it wasn’t possible for many early airplanes to make the distance. They simply didn’t have the size or the fuel capacity to fly that far. Instead, the Americans focused on transatlantic flights.

With the establishment of the famous Pan Am Airways in 1927, America had an airline that could fly its passengers to countries like those in South America, but also to Europe and up and down the east and west coasts of the United States. The early passenger planes were romantically called the Pan Am Clippers. The word ‘clipper’ comes from a type of fast sailing ship, so fast that it ‘clips’ or skims along the water. The analogy was transferred to aircraft which would ‘clip’ through the air. An age of romantic and stylish air-travel had begun.


Pan American route-map, 1936

Travelling by Pan Am clippers was expensive, and could only be done from certain cities – all the planes were seaplanes, which took off from, and landed at, coastal regions. Pan Am was one of the first airlines to offer transatlantic flights.

The limitations of aircraft in the 1930s meant that not all flights were direct. Although Pan Am was flying the latest seaplanes, as designed by the famous Boeing aircraft-manufacturers, sometimes, a plane flying from America to Europe might stop at Newfoundland, Greenland and Iceland for refueling, before finally arriving in France or the United Kingdom. Some simply did not have the fuel-capacity or size to brave direct routes across the Atlantic Ocean. To restore passenger confidence, Pan Am had among the best pilots in the world – specially trained and carefully selected for their long-haul routes, where pilots were expected not just to fly the plane, but also fix it, if it had to make an emergency landing on the ocean, and get it back into the air again!

Come fly with me, let’s fly, let’s fly away…
A Pan American clipper seaplane, typical of the 1930s and 40s

Despite technological limitations of the times and low passenger-capacities, the old ‘clipper’ seaplanes did have one advantage which most modern aircraft do not. As they were designed to take off and land on water, the likelihood of surviving an emergency landing on water (a real possibility in those days!) was generally quite high. One such Pan Am aircraft, the Honolulu Clipper, flying Pacific Ocean routes, was forced to land in the middle of the ocean in 1945, when its starboard engines failed. The plane made a safe water-landing, but the pilots were unable to restart or repair their dysfunctional engines. Radio-contact with passing ships saw the passengers safely offloaded, but attempts to tow or fly the plane back to a coastal service-area failed, and it was left to drift and sink.

The same thing happened again in 1947, when another Pan Am ‘clipper’ (this time, the Bermuda Sky Queen) ran out of fuel halfway across the Atlantic! In the middle of a fierce storm, the aircraft was forced to make a crash-landing on the heaving Atlantic Ocean. Against all probability, the seaplane survives the impact with the water, and remained afloat for 24 hours! Long enough for pilots to send out distress messages, and to offload passengers into inflatable life-rafts stored on the airplane. The U.S. Coast Guard responds to the radio call for help, and rescue all passengers and crew.

It was incidents like this that assured the flying public of Pan America’s safety, boosting their numbers of passengers and increasing the need for better airports. Even if their ‘clipper’ got into strife, they knew that they would be able to land safely and be reliably rescued, thanks to radio communications.

Airships

From the 1900s until the late 1930s, what with airplanes being unable to travel long distances with safety, most people thought that the way forward for air-travel lay in the famous Zeppelin airships made famous by the Germans. Airships were slower than planes, but faster than ocean-liners, and could carry passengers in comfort. However, a series of devastating crashes in the 1930s, most famously, that of the Hindenburg, scared the flying public away from airship travel. And at any rate, by the end of the Second World War, aircraft design and capabilities had improved enough to make airships a thing of the past!

Airport Development

As air-travel becomes more and more appealing and romantic, the larger numbers of passengers all around the world means that serious thought must now be given to airport design and functionality. Below, we’ll find out about the origins of some of the features that would be found in any modern airport today.

Air-Traffic Control

A crucial component of all airports is one which most people never notice. Air-traffic control. Without it, no airport could possibly operate with any degree of safety or efficiency.

Air traffic control as we might know it today, has its origins in 1920s London. At Croydon Airport outside of the city, the first radio-operated air-traffic control systems are put in place in the early 1920s after two aircraft, one flying towards, and one away, from the airport, collide in midair.

To get better fixings on airplane-locations in the future, all airplanes are fitted with radio-beacons which send out waves. Three receivers around the airport bounce back the radio-waves, and by using three points of reference, are able to get an accurate fix on the location of any one aircraft at a time. This is the birth of modern aircraft tracking and positioning, which is eventually improved in the 1930s and 40s, with the arrival of 1st-generation RADAR.

Gates

As airports began to be more established in the 1930s, serious thought was finally being given to airport design. At the height of the Art Deco craze, airports of the 1930s were typically modeled after the only other example of large, passenger-handling buildings familiar to architects and designers at the time – grand railroad stations.

Modelling airports after the great railroad stations of Europe and the Americas had their pluses and minuses. Having large halls and gathering areas was convenient, but it could be tricky when it came to separating arriving and departing passengers. It would be too easy to get lost in the big central terminal which comprised the bulk of early airports. It was now that architects realised that some way of separating and organising passengers would need to be inbuilt into any future airport designs.

The idea of airport gates as we might know them today, came about in the 30s with London’s Gatwick Airport.

In order to load, offload and service as many airplanes as possible, Gatwick’s main terminal was built in a stylish “Beehive” shape:

The ‘Beehive’ meant that planes could circle around the central terminal, load up or offload passengers, and then taxi away smoothly, without the danger of crashing into other aircraft. This also allowed for passengers to be spread out, and be more easily organised, instead of being huddled up and being channeled through two or three doors. Corridors, walls and partitions inside the circular building could divide passengers into arrivals and departures. Now, they could move smoothly through the building, and in and out through multiple entrances and exits, speeding service and easing congestion.

Welcome to…’The Beehive’!

The first prototype gates were introduced at Gatwick. Previously, boarding a plane was an unpleasant experience – you left the terminal and crossed the tarmac and climbed a set of boarding-stairs onto the aircraft. This was bearable during good weather, but when it was rainy or windy, or even snowing, you probably felt more comfortable taking a train!

To provide passengers with greater comfort and protection from the elements, Gatwick Airport installed the first retractable, telescopic corridors ever to be used in airports – and which are the grandparents of all the covered boarding-ramps which we have today.

Numbering six in total, the telescoping corridors slotted neatly into each other and could be retracted when a plane was taxiing into position, and then rolled out once the aircraft was in place for boarding. Having six gates allowed for greater passenger organisation, and prevented overcrowding.

As airports boomed in the 1950s and 60s, with the arrival of the jet-age and the ‘jet-set’, and the vast advances made in aircraft design during the Second World War, airport improvements struggled to keep up. Organising passengers, providing amenities, providing parking, baggage-handling and other services became constant struggles.

Terminals

Terminals, large buildings which organise passengers, and provide them with the facilities and amenities which they need and require, are a key part of every airport in the world.

Imagine trying to board a plane, when you have to run from one building to another, to another, to another, then out onto the tarmac, and then onto the plane…

You’d rather walk from San Francisco to Chicago.

It was buildings such as the ‘Beehive’ (mentioned further up) that showed how all airport facilities could be housed, and how passengers could be sorted, all inside one building – comfortably, efficiently and without wasting time or money.

Airport terminals continued to evolve in the postwar period. Larger passenger-numbers meant that organisation was crucial. New York’s famous La Guardia Airport, which opened in the late 1930s, took the Gatwick model and upgraded it for even larger passenger loads, and better organisation.

The difference was that the ‘Beehive’ terminal at Gatwick is just one level – restaurants, ticket-counters and facilities are all on the ground floor – and upstairs is all offices. And arriving and departing passengers are all handled in that one, ground floor area. Yes, you can sort them out as they enter or leave, but not while they’re in the actual building. For the city which coined the phrase a ‘New York Minute‘, having thousands of passengers wandering around aimlessly inside their new airport terminal is a huge waste of time!

La Guardia Airport, 1940s. Note the seaplane dock, for Pan Am ‘clippers’

To nip this problem in the bud, the terminal at La Guardia is built on two levels! Departures are upstairs, arrivals are downstairs! They never mix, they never mingle, there’s no chance for someone to get lost. Passengers arriving at La Guardia can go straight in, where waiting friends or relations can meet them on the ground floor, without having to find their way upstairs and get lost. Departing passengers head to the upper level when they reach the airport, and wait for their aircraft, well out of the way of arrivals from overseas or other parts of the country. Also located in the departing area were restaurants, bathrooms, shops, lounges, public telephones and other facilities which allowed a departing passenger to kill the time between arriving at the airport, and actually sauntering out to his airplane.

Airport Security and Baggage Check-In

The one thing which everyone can’t stand – airport security. Metal-detectors, x-ray machines, dipweeds standing around waving wands up and down trying to find stuff on your body that ain’t there, and all eating up valuable time which you could be using to buy duty-free items. Like those chocolates. Or wine. Books for the flight, or CDs for your friend back home.

In the postwar era, airport security became a serious issue. With more and more people boarding aircraft and with more people flying, it became increasingly difficult to run security checks. Skyjackings forced the hands of many airports to try and find ways to stop terrorists at airports, before they boarded the planes.

Skyjackings were at an all-time high in the 60s and 70s; up to forty attempts were made on American aircraft in 1969 alone! Airports could not turn a blind eye to this. If people were afraid to fly, then airports would be bleeding money and losing customers nonstop, which would be a disaster.

The first airport metal-detectors and luggage-scanners entered terminals in the 1970s, taking inspiration from the log-scanners used at sawmills, to detect foreign bodies buried in tree-trunks, such as nails and bullets. Electromagnets on all sides scan a person as he goes through the metal-detector, and any metal on the body is reflected back to the magnets, which triggers that annoying beeping sound that we all hate so much!

At around the same time that airport security started becoming an issue, airport baggage-handling was taking a step up.

Previously, all luggage was handled by human bag-handlers. And generally, most of it still is. But the innovation came in how bags were sorted and organised in the airport. The way forward was shown in the mid-1970s, when barcodes, like those found on almost every type of consumer-product today, started becoming commonplace.

The idea of barcodes started back in the 1940s, but it wasn’t until the 70s that reliable printing methods (which didn’t smudge the ink, rendering the codes illegible) allowed barcodes to become part of everyday life. Poor printing of barcodes meant that the laser-scanners which read the codes could not distinguish between the different bars, when the ink smudged or ran together.

Now, when you check in, a tag is stuck onto your suitcase or roller-bag, with a barcode on it. And a simple scanning of the code tells the conveyor belts and baggage-handling systems where any particular bag is meant to be, and which flight it is destined to.

The Golden Age of Flight

The 1930s-1960s was the ‘Golden Age’ of commercial aviation. The time when it was new, exciting, and changing all the time. Yes, it’s still changing, but now it’s part of everyday life, and it’s frustrating and boring and just a means for getting from A to B. How much air-travel has changed since this period up to the modern day is staggering. And not just because now, we all have our own little movie-screens in our seatbacks, and can no-longer pack knitting-needles and crochet-hooks into our carry-ons.

Differences between aircraft travel then, and now, is the incredibly relaxed nature of older air-travel. Not just in security and luggage-allowances and whatnot, but also in the positioning of seats and greater attention being paid to style and passenger comfort, which to a certain extent doesn’t exist anymore.

For one, aircraft interiors were designed to be much more open-plan, in a manner which most (unless it’s a private aircraft) are not, today. This flexibility and openness is sadly missing, from much of modern air-travel, where people have to fight for leg-room and moving-space, instead of being crammed into airplanes like sardines. The idea that ‘legroom’ was an issue on older aircraft is probably laughable! And before the days of personal video-screens, passengers had much more creative ways of killing time during those long flights.

Bored? Why not show off your music chops on the keys, and provide some live entertainment for fellow passengers? If they vote you off, a parachute is stored under the piano-bench.

Our Final Approach

The next time you’re hauling your luggage through the terminal, patting yourself down to make sure you didn’t forget your tickets, passport, wallet, photographs, iPad, pens, favourite book, keys, or other essentials, spare a thought for the long, trial-and-error journey that the modern airport took.

It’s come a long way from a farmer’s field that’s had a once-over with a lawnmower. The modern airport has everything from hotels, restaurants, shops, medical clinics, cinemas, internet-access and prayer-rooms. Even a multistory slide, if you’re stuck in Singapore’s Changi Airport for a few hours with nothing to do.

Weeeeeeeeeeeeeeeeeeeeeee!!

Few other buildings have had the challenges of airports – organisation, people-management, security, luggage-handling, segregation and amenities. And yet without them, modern air-travel would be thoroughly impossible.

Want more information?

Documentaries:

Big, Bigger, Biggest:

Episodes – ‘Aircraft’, ‘Airports’.

Modern Marvels: ‘Airports’

Ten Things We Miss About Air-Travel